Discover art at discounted prices today!
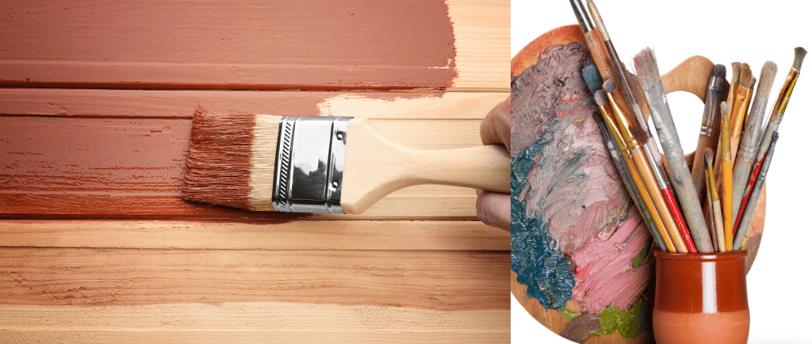
The Ultimate Guide to Choosing the Right Paint for Your Wood Crafts
Here is a detailed blog post about the best types of paint to use for wood crafts:
3/15/20257 min read
Introduction
If you're an avid DIY-er or woodworking enthusiast, you know that choosing the right paint can make all the difference in the final look and durability of your wood crafts. Whether you're refinishing old furniture, painting custom signs, or creating handmade home decor, the type of paint you select is crucial.
In this comprehensive guide, we'll dive into the various paint options available for wood projects and provide expert tips to help you select the perfect paint for your needs. We'll cover the key factors to consider, the pros and cons of different paint types, and step-by-step guidance on properly preparing and applying the paint for professional-looking results.
By the end of this post, you'll have all the knowledge you need to confidently tackle your next wood craft project and achieve a beautiful, long-lasting finish. Let's get started!
Understanding Paint Types for Wood
When it comes to painting wood, you have several options to choose from, each with its own unique properties and benefits. The most common types of paint used for wood crafts include:
Acrylic Paint
Acrylic paint is a water-based, fast-drying paint that is a popular choice for many wood projects. It's easy to apply, dries to a smooth, matte finish, and is available in a wide range of colors. Acrylic paint is also relatively inexpensive and cleanup is simple with just soap and water.
The main advantages of acrylic paint for wood are:
Dries quickly, usually within 30 minutes to an hour
Offers a matte, velvety finish that's great for a rustic or farmhouse look
Can be easily distressed or sanded for a vintage, worn appearance
Cleanup is a breeze with just soap and water
Wide color selection available
However, acrylic paint may not be as durable as other options, especially for high-traffic or outdoor pieces. It can also be prone to chipping or peeling over time if not properly sealed.
Latex Paint
Latex paint is another water-based option that is a great choice for wood crafts. It provides excellent coverage, dries to a smooth, satin or semi-gloss finish, and is highly durable. Latex paint is also easy to clean up and less toxic than oil-based paints.
The key benefits of latex paint include:
Durable and long-lasting finish
Smooth, satin or semi-gloss sheen
Easy water-based cleanup
Lower odor and fewer fumes compared to oil paints
Widely available in a variety of colors
The main downside of latex paint is that it may not adhere as well to smooth, varnished wood surfaces as other paint types. Proper surface preparation is crucial for getting the best results.
Oil-Based Paint
Oil-based paints are another popular option for wood crafts, particularly for outdoor projects or high-wear areas. They provide an extremely durable, glossy finish that is resistant to chipping, fading, and moisture damage.
Some of the key advantages of oil-based paint include:
Highly durable and long-lasting
Offers a beautiful, glossy finish
Excellent adhesion to wood surfaces
Provides a protective barrier against moisture and wear
The main downsides of oil-based paints are that they take longer to dry, have a strong odor, and require mineral spirits or paint thinners for cleanup. They also tend to be more expensive than water-based paints.
Chalk Paint
Chalk paint is a specialized type of paint that has become increasingly popular for wood crafts and furniture refinishing. It provides a velvety, matte finish that can easily be distressed or given a vintage, worn appearance.
The top benefits of chalk paint include:
Adheres well to a variety of surfaces, including wood, metal, and glass
Provides a unique, matte finish that can be easily distressed
Requires minimal surface preparation
Dries quickly, usually within 30 minutes
The main drawback of chalk paint is that it may not be as durable as other paint types, especially for high-traffic areas. It also typically requires a wax or sealant topcoat for added protection and longevity.
Factors to Consider When Choosing Paint for Wood Crafts
Now that you understand the different types of paint available, it's important to consider the specific factors that will influence your choice for a particular wood project. Here are the key things to think about:
Project Purpose and Use
The intended use and location of your wood craft will play a big role in the type of paint you should select. For example, if you're painting a piece of indoor furniture, you may opt for a durable latex or acrylic paint. But if you're creating an outdoor sign or garden decor, you'll want a more weather-resistant oil-based or chalk paint.
Consider factors like:
Will the piece be used indoors or outdoors?
How much wear and tear will it be subjected to?
Will it be exposed to moisture, sunlight, or other environmental elements?
Choosing the right paint based on the project's purpose and usage will ensure the finish lasts and holds up well over time.
Wood Type and Condition
The type of wood you're working with and its current condition will also affect your paint selection. Smooth, bare wood will typically require less surface preparation than previously painted or varnished surfaces.
Think about:
Is the wood new, unfinished, or previously painted/stained?
Is the wood smooth and even, or does it have texture or imperfections?
Will the paint need to adhere to a challenging surface, like pine or oak?
Certain paint types, like oil-based and chalk paint, tend to work better on more porous, textured woods, while latex and acrylic paints may require more prep on smooth, varnished surfaces.
Desired Finish
The look and sheen you want to achieve with your painted wood craft is another crucial factor. Do you want a glossy, high-shine finish? A matte, distressed appearance? Or something in between, like a satin or semi-gloss?
Different paint types provide varying levels of shine and opacity:
Acrylic and latex paints typically offer a matte or satin finish
Oil-based paints deliver a high-gloss, shiny look
Chalk paint creates a distinctive, velvety matte finish
Consider how the final finish will complement the overall style and aesthetic of your wood project.
Application and Cleanup
The ease of application and cleanup is an important practical consideration when choosing paint for wood crafts. Water-based paints like acrylic and latex tend to be the easiest to work with, requiring just soap and water for cleanup.
Oil-based paints, on the other hand, can be more challenging to apply and require mineral spirits or paint thinners for cleanup - a factor that may be less appealing for some DIYers.
Think about:
How comfortable are you with the application process?
Do you have the right tools and solvents on hand for cleanup?
Is the mess and odor of oil-based paints a concern?
Selecting a paint that aligns with your skill level and workspace can make the project more enjoyable and the results more professional.
Preparing the Wood Surface
Proper surface preparation is crucial for ensuring your paint adheres properly and provides a long-lasting, high-quality finish. Here are the key steps to prepare wood for painting:
Clean the Surface: Start by thoroughly cleaning the wood to remove any dirt, grease, or debris. Use a degreaser or mild soap and water to wipe down the surface.
Sand the Wood: Lightly sand the wood to create a smooth, even surface. This will help the paint adhere better. Start with a coarse grit sandpaper (80-100 grit) and gradually work your way up to a finer 120-150 grit.
Remove Dust: Thoroughly wipe away any sanding dust with a clean, dry cloth or tack cloth. Make sure the surface is completely free of debris before painting.
Prime the Wood (if needed): Depending on the type of wood and the paint you're using, you may need to apply a primer coat first. This helps the paint bind to the surface better, especially on tricky woods like pine or oak. Oil-based and latex paints typically require a primer, while chalk paint may not.
Sand Between Coats: For the smoothest, most professional-looking finish, lightly sand the surface again between each coat of paint. This will help the layers adhere properly and create a seamless, uniform appearance.
Clean Up Edges: Use painter's tape or a steady hand to carefully paint along the edges and corners of your wood project. This will give you crisp, clean lines.
By taking the time to properly prepare the wood surface, you'll set yourself up for a beautiful, long-lasting painted finish on your crafts.
Applying the Paint
Now that you've selected the right paint and prepped the surface, it's time to start painting! Here are some tips for applying the paint effectively:
Use the Right Tools: Invest in high-quality paintbrushes, rollers, or paint sprayers designed for the type of paint you're using. This will make the application process much smoother.
Apply in Thin, Even Coats: Instead of globbing on thick layers of paint, apply it in thin, even coats. This will help prevent drips, bubbles, or an uneven finish. Allow each coat to fully dry before adding the next.
Brush in the Direction of the Wood Grain: When painting by hand, always brush in the direction of the wood grain for the smoothest results. This will help the paint flow more evenly.
Feather the Edges: When painting along edges or corners, use a light touch and "feather" the paint outward to blend it seamlessly.
Sand Lightly Between Coats: As mentioned earlier, lightly sanding between each coat of paint will create an ultra-smooth, professional finish.
Apply a Sealant or Topcoat (if needed): Depending on the paint type, you may need to apply a clear sealant or topcoat for added protection and durability. This is especially important for pieces that will see a lot of wear and tear.
By following these best practices for paint application, you'll end up with a beautifully finished wood craft that looks like it was done by a pro.
Caring for Painted Wood Crafts
To keep your painted wood projects looking their best for years to come, proper care and maintenance is essential. Here are some tips:
Avoid excessive moisture: Wipe up spills quickly and keep painted wood away from high-humidity areas.
Clean gently: Use a soft, damp cloth to wipe down painted surfaces. Avoid abrasive cleaners or scrubbing.
Reapply sealant/topcoat as needed: For high-traffic pieces, reapply a clear sealant every 1-2 years to maintain the protective finish.
Touch up scratches or chips: Use a small paint brush to carefully fill in any minor nicks or scratches.
Store carefully: If storing painted wood crafts, wrap them in soft cloths or bubble wrap to prevent scratches.
By following these simple care guidelines, you can ensure your beautifully painted wood projects maintain their vibrant color and durable finish for the long haul.
Conclusion
Choosing the right paint for your wood crafts is essential for achieving professional, long-lasting results. Whether you opt for acrylic, latex, oil-based, or chalk paint, carefully considering the project's purpose, wood type, desired finish, and your own application needs will help you select the perfect paint.
With the right preparation and painting techniques, you can transform ordinary wood into stunning, one-of-a-kind creations that will be the envy of all your friends and family. So get out there, get painting, and let your creativity shine!
Jothashilpa Studio Limited
House 29, Road 13, Shekhertek, PC Culture Housing, Mohammadpur, Dhaka 1207, Bangladesh.
Email: jothashilpaonline@gmail.com
Call us: 01949998035
Contact
Subscribes
+880 1949998035
© 2025. All rights reserved.